TaylorSense Installation Instructions for ES2, ES-T and ES-N Pickup Systems - Version 1
How to install the TaylorSense battery box in Expression System 2 (ES2), ES-T and ES-N pickup systems
These installation instructions are only for guitars with the following three Taylor pickup systems: Expression System 2 (ES2), ES-T and ES-N (nylon-string). If you are not sure which pickup system is in your guitar, return to the step for "Identifying the Expression System Pickup in your Taylor guitar" by clicking here.
Required Tools:
Phillips-head screwdriver
One piece of masking or painter's tape
Step 1: Remove or loosen the strings of your guitar so your arm can easily fit inside the soundhole of your guitar.
Step 2: Reach inside the soundhole toward the lower left of the guitar, and follow the side of the guitar with your hand.
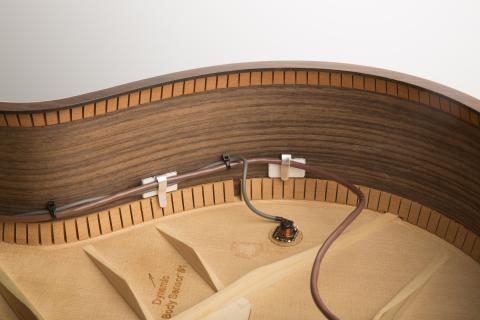
You should feel a wire along the edge where the guitars top and side meet as shown below in Image 2a. Follow it along the guitar body (toward the battery box) until you feel the wire clip that holds the wire in place closest to the battery box. (There is more than one wire clip.)

Image 2a- You should feel a wire along the edge where the guitars top and side meet.
Step 3: Bend the wire clip up to release the wire. This will provide the necessary slack for the battery box to move.
See below Images 2b and 2c.
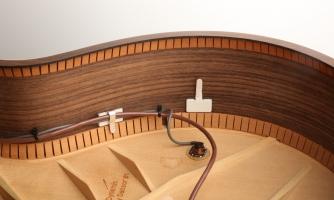
Image 2b- Bend the wire clip up to release the wire.
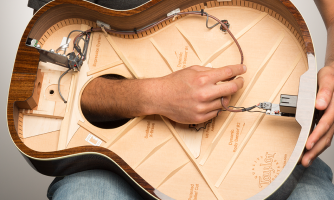
Image 2c- Make sure you have enough slack for you to remove your battery box.
Step 4: Remove the battery cradle from the original battery box in your guitar.
See below Image 2d.
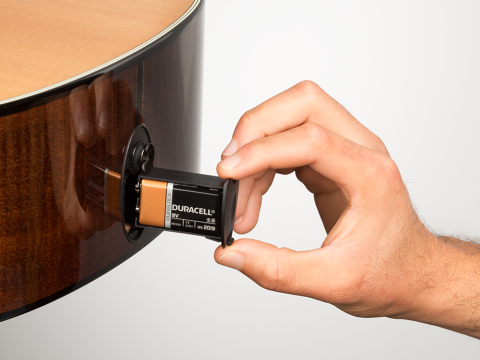
Image 2d- Remove the battery cradle from the original battery box in your guitar.
Step 5: Using a Phillips-head screwdriver, remove the two screws from the battery box. Be sure to save the screws. You will need them to install the TaylorSense battery box.
See below Image 2e.
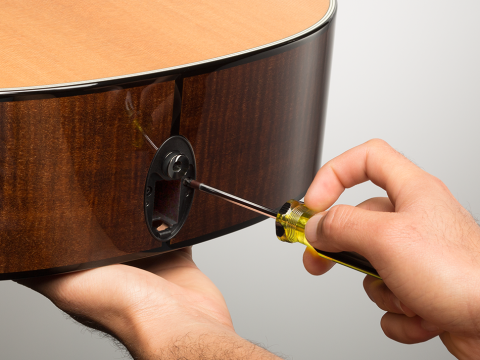
Image 2e- Remove the two screws from the battery box.
Step 6: Carefully pull out the battery box—it is attached to the guitar by wires and a black plastic connector clip. Flip the battery box over so the circuit board is on the bottom.
See below Image 2f.
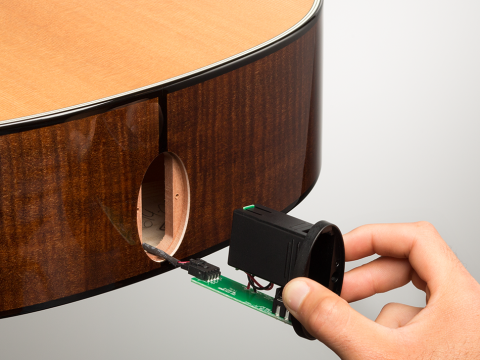
Image 2f- Carefully pull out the battery box.
Step 7: Pinch the wire at the base of the black connector clip and pull to disconnect it. Keep holding the black connector clip so it does not fall back into the guitar, or tape it to the outside of your guitar to secure it and free your hands.
See below Image 2g. Please note that a piece of masking or painter's tape will not damage the outside of your guitar.
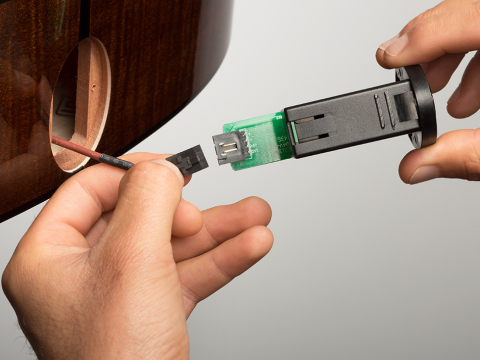
Image 2g- Pinch the wire at the base of the black connector clip and pull to disconnect it.
Step 8: Take your new TaylorSense battery box, with the circuit board on the bottom, and attach it to the black connector clip. It should snap in place easily. You will hear the clip click when secured properly.
See below Image 2h.
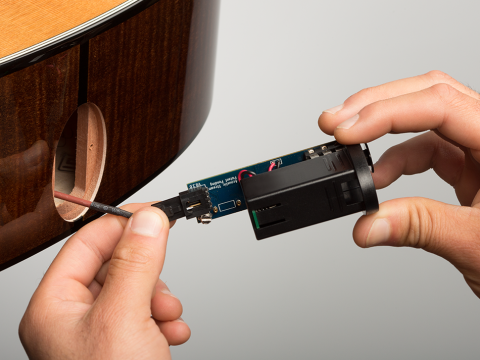
Image 2h- Take your new TaylorSense battery box, with the circuit board on the bottom, and attach it to the black connector clip.
Step 9: Flip the TaylorSense battery box back over so the circuit board is on the top. Slide it in place.
See below Image 2i.
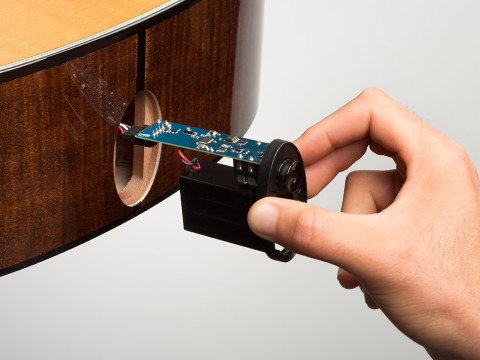
Image 2i- Flip the TaylorSense battery box back over so the circuit board is on the top. Slide it in place.
Step 10: Reinstall the two screws.
See below Image 2j.
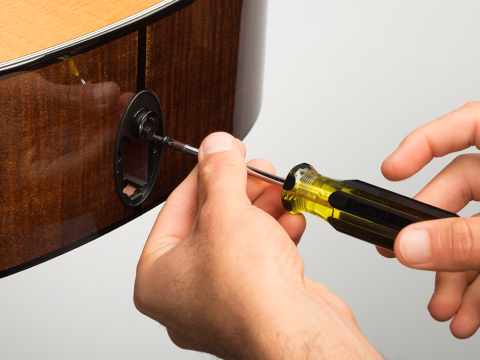
Image 2j- Reinstall the two screws
Step 11: Reach through the soundhole and re-secure the wire inside the guitar by bending the clip to hold it in place.
See below Images 2k and 2l.

Image 2k- Reach through the soundhole and re-secure the wire inside the guitar by bending the clip to hold it in place.
Bend the wire clip down to re-secure the wire inside the guitar.
Step 12: Install a fresh 9V battery in the battery cradle. At Taylor we use a high-energy Duracell battery, but any quality battery will work as long as it fits inside the cradle.
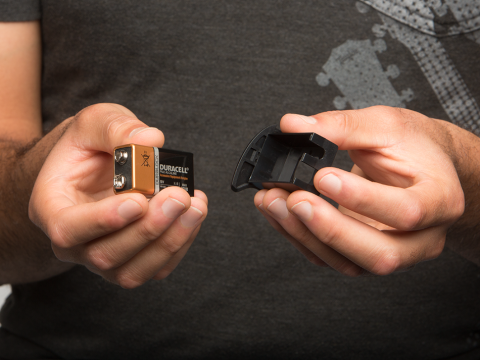
Image 2m- Install a fresh 9V battery.
Step 13: Snap the battery cradle into the TaylorSense battery box.
See below Image 2n.
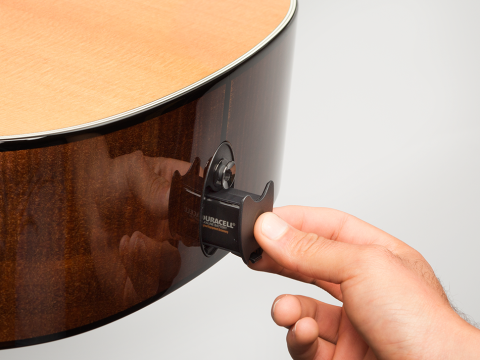
Image 2n- Snap the battery cradle into the TaylorSense battery box.